Thursday, February 5, 2015

Twice Baked Sweet Potatoes


So one night when we were having Twice Baked Potatoes (with regular potatoes) my husband said, "I've heard Twice Bake Potatoes using Sweet Potatoes are really good too. You should try it sometime." If I had a fork in my hand at that second I might have dropped it. You see, after we were married I tried making a couple recipes with sweet potatoes but each time my husband refused to eat them....said he didn't like sweet potatoes. So, I gave up. A few years later he tries sweet potato fries at a couple different restaurants and comments one day that he decided he likes them. Well, anything fried and crispy and oily is usually going to taste good so I guess that didn't surprise me too much, but him suggesting me to make dinner with them....? That did!!!
Well if my husband finally put in a request for a sweet potatoe dinner after a few years of marriage, gosh dang I was going to do it! Turns out, I loved it, the kids loved it and guess what? He did too! So I'm going to share it with you all too in hopes that you will love it as much as we do! Regular twice baked potatoes are already super yummy, the sweet potatoes just make them AMAZING! 

Here are the instructions:

Preheat the oven to 350 degrees. Then bake the potatoes for one hour or until soft. 

Brown bacon till crispy. Drain crumble and set aside.

When potatoes are done allow them to cool for 10 minutes. Then slice the potatoes in half lengthwise and scoop the flesh into a large bowl leaving about 1/4 inch of flesh so the potato maintains its shape; save skins. 

To the potato flesh add sour cream, butter, salt, pepper, 1/2 cup cheese, and milk. Do not add all the milk at once because you may not need it all. Just mix a little in at a time till it's the right consistency. Too much milk will make them runny, not enough will make them to dry and not smooth. Mix with a hand mixer until well blended and creamy. 


Spoon the mixture into the potato skins.


Top each with remaining cheese, green onion and bacon.


Bake for about 15 minutes or until heated through and cheese is melted. 


Yum! Look at all that sweet potato and cheese and bacon. Once you've tried the sweet potato version you may never want to go back! 


Twice Baked Sweet Potatoes

4 Large Sweet Potatoes
8 Slices bacon or Real Bacon Bits
1 cup sour cream
1/2 cup milk
4 Tbsp. butter
1/2 tsp. salt
1/2 tsp. pepper
Grated Cheddar cheese, divided
Sliced Green onions to taste

Preheat the oven to 350 degrees. Then bake the potatoes for one hour or until soft. 

Brown bacon till crispy. Drain crumble and set aside.

When potatoes are done allow them to cool for 10 minutes. Then slice the potatoes in half lengthwise and scoop the flesh into a large bowl leaving about 1/4 inch of flesh so the potato maintains its shape; save skins. 

To the potato flesh add sour cream, butter, salt, pepper, 1/2 cup cheese, and milk. Do not add all the milk at once because you may not need it all. Just mix a little in at a time till it's the right consistency. Too much milk will make them runny, not enough will make them to dry and not smooth. Mix with a hand mixer until well blended and creamy. 

Spoon the mixture into the potato skins. Top each with remaining cheese, green onion and bacon. Bake for another 15 minutes or until heated through and cheese is melted. 


Monday, January 19, 2015

Black Buttoned Down Sweater with Rustic Jeans


Curly ombre hair, black sweater with buttons on the sleeves, holy boyfriend jeans and leapord print flats. Comfy, cute and perfect for everyday wear! 


I am not going to lie, these have been staples in my closet for years. That's the nice thing about holy jeans.....you don't have to toss them when they get a hole! The shoes I got from Target. The others, well let's just say anything over a year and my brain tosses it out:)


Wednesday, January 7, 2015

New Years Eve Table Decor


This was a last second idea that popped in my head. Okay, by last second I mean: I thought of it, I shopped for it and I created it in less then a week. If I had more time I might have done a fun table runner down the middle of the table or a fun backdrop, but for the time, I am very pleased with how it turned out. Stay tuned for the tutorials at the end of this post. 


The pink plates were a happy accident. I had actually planned on using black plates but I couldn't find them when it was time to set the table so I used what I could find. Turns out, I love the pop of color. I think aqua plates would have been fun too. I have three kids so paper products are the way to go for my family when we want "special dinnerware". Plus, it's not nearly as expensive and I don't have to store them all year to use once a year. If the rest of the table is dressed up, you won't even notice that your dishes are throw a way :) We were having a fondue dinner so no utensils were allowed. Only fondue sticks! 


At the end of this post I will give you the tutorial on how to make this fun gold glitter dipped glass jar. It's so easy and literally took me less then ten minutes! What a large impact for such a cheap easy project.


I LOVE all the fun straws out there these days! I was gonna settle for black till I saw these gold babies and it was love at first sight. They were perfect for what I wanted. They were $2.47 at my local Walmart. 


I got a pack of a 100 fondue sticks at Walmart for a $1.00. I found this gold sequin like ribbon at Joanne Fabric store and knew I needed to use it somewhere. I just took a small handfull of fondue sticks, wrapped the ribbon around it a couple times, cut the end and used a little Elmer's glue on the end. A glue gun would probably have worked better, but I was too lazy to go find it and I figured the elmer's would work just fine :)


Isn't that gold dipped jar so fun?! The little pearls you see scattered on the table are actually sprinkles! They came in a jar with several different kinds of sprinkles all gold and white. My kids loved picking them up off the table and eating them. And I'm sure my 15 month old baby will love them too as she finds the ones that rolled off the table and into a crevice somewhere. She may be finding one here and there for the next couple months! I swear, she finds things in our house that I didn't knew existed! I'll blame it on the age and not my lack of cleaning. ;)


I found these gold frames at a thrift store for 50 cents each about two years ago. Forgot I had them. I had put them in the crawl space while they waited to be sprayed a bright color for my girl's room. I found them and decided a change of plans was in order. I took the glass and sprayed it with chalkboard paint. Then with my silhouette cameo machine I cut out Happy New Year with gold vinyl. I love how they turned out!


Here is an upclose of the Happy.....


and the New Year....


Okay, so remember how I told you about those gold and white sprinkles? Well, this glass is dipped in some of those gold sprinkles! My kids LOVED this. Stay tuned for tutorial below. You gotta do it. Your kids will love it. 


So here is a reminder of what it all looks like! 


On to the tutorials! So you'll need a glass jar of any size/shape that you want. Also, modpodge, a paper plate, gold glitter and a brush. 


Using the brush, paint some modge podge on the glass jar from the bottom of the jar up as high as you want the glitter to go. I forgot to take a picture of this next part. Holding the jar over the paper plate, spirnkle the glitter all over the wet modge podge till it's covered as good as you want it. Once dry, take some seran wrap and crinkle it up in the bottom. Who knew seran wrap could add a pretty texture and shimmer?!


And there you have it! 


Stick some pretty straws in and you have this! 


As for the dipped glasses....and yes, I let my kids use real glasses! Don't be afraid to mix some fancy dishes with colored paper products to make it more kid friendly. And like us, you can totally drink koolaide or water in these fancy glasses! 

You will need:

Fancy glasses
Corn Syrup
paper plates
Sprinkles


Pour some corn syrup on a paper plate. 


Pour some sprinkles on a different paper plate.


Dip a glass in the corn syrup....


then immediately dip it into the sprinkles. 


Turn it right side up and let it dry! 


This adds so much glamour to the table! Think of all the fun possiblities! It was yummy too. Corn syrup and sprinkles....what's not to love? My kids licked it clean. 


I hope you enjoyed this and that maybe just maybe you got inspired to create your own New Years Table next year! Happy creating!


Saturday, November 8, 2014

Mustard Yellow with Black and White Polka Dots

Welome to my Fashion Friday Week #1 ! I will be posting a new outfit every Friday. I love clothes, makeup, hair, accessories.....I always have! I am a mom of three though so honestly, I am not dressed up every day. No use dressing up to clean toilets and change poopy diapers right?! However, I love the oppurtunity to dress up every chance I can get:-)

So anyone who knows me knows my "mustard yellow sweater". I LOVE that sweater. I will wear that thing till it's in shreds and I can't pull it over my arms anymore!  One of the best purchases I ever made!

So of course I had to start out my Fashion Fridays with an outfit sporting that exact sweater......


Here is a break down: 
Mustard yellow sweater (Forever 21)
White shirt (Down East)
Black and white polka dot skirt (Jane.com)
Mustard yellow vintage inspired heels (Forever Young)
Bar necklace (Jane.com)
Red nail polish and curly hair pinned over my shoulder on one side


Next week I promise not to have a curling iron cord and large lego blocks in the back ground lol :-)

Have a great day!


Friday, October 31, 2014

It's Halloween at our House!


It's Halloween at our house! Here is my sweet kiddos all dressed up in their halloween outfits I made for them. They actually smiled for the pictures! 


Here is an upclose of the shoes I made for my baby girl. They are available in my Etsy shop incase anyone is interested!  


Here is our bowl of candy ready for trick or treaters. Yum!


I made this last year at the hospital when Lexi was in the NICU. Her foot was so TINY back then!


Cut some wood squares, modge podge some scrapbook paper on and cut vinyl out to put on and you have an easy Halloween decoration! 


I cut some fun Halloween figures out of vinyl and put on some plastic cups for our Family Halloween party. The kids LOVED them! If anyone is interested, they are available in my vinyl Etsy shop. 


This has been my all time favorite Halloween project. I took an old window and cut Halloween figures out to put on it. I get compliments on it all the time:) I hope to eventually have one for every holiday.


This is my Welcome post when people come in our front door. I can change out the board that is hooked on with each holiday. The one on it now is with witch feet and it says "If the shoe fits".


I whipped this up pretty quick. Bunting can have such a big impact for such a low cost/time and effort to make. 


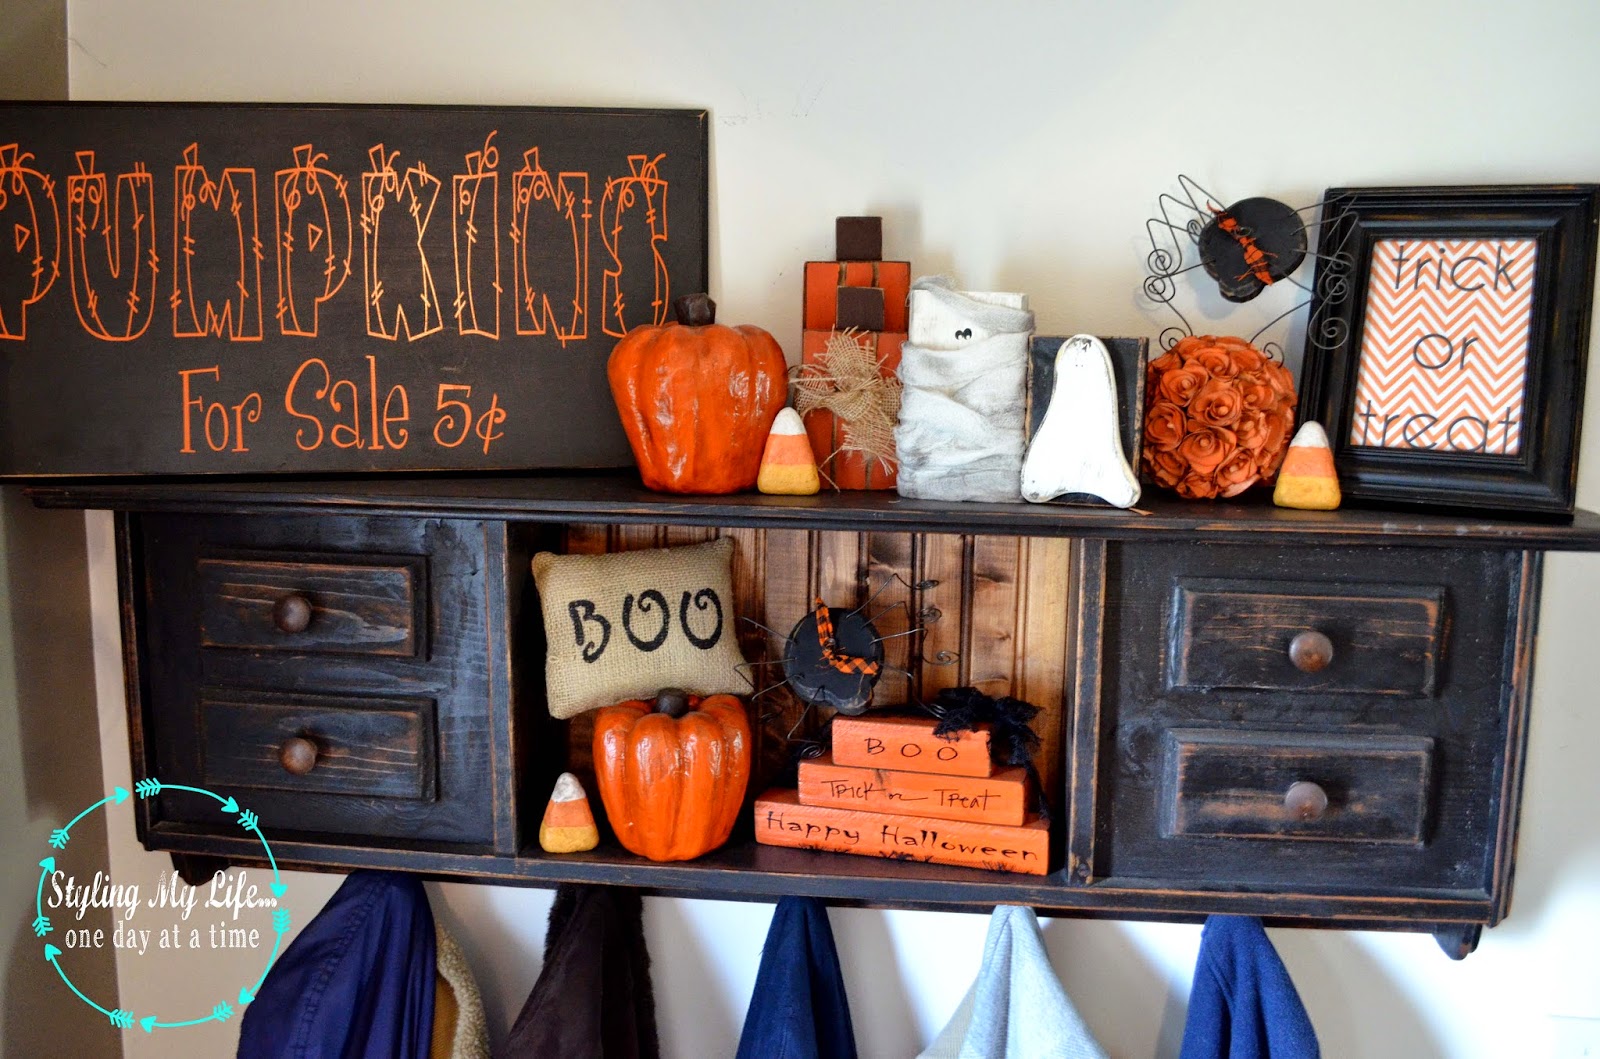
My husband made this shelf. I switch out the decorations with the holdidays/seasons. He has a variety of colored shelves available in his Etsy shop. 


Below are closeups of all the things on my shelf. Most of them I made. All super easy projects!


Thanks for stopping by! Happy Halloween!